mandag den 3. september 2012

The Beat - The Dubstep Beat


We are now going to make a basic dubstep beat.

First make the tempo (bpm) 143 (the basic is 140):


We are first doing the actual beat by assigning the drums. Clone as below, set volume and assign notes:


Second assign these drums a mixer track and Eq them as below:


After put to snare notes and assign them to a mixer channel aswell:


Make the hihat as below, doing the notes between the snare and kick ones. Try to play the sounds to a feeling of where we are going!


When done with the hihat notes try to control the velocity as below and see what it sounds like, the dropdown menu will come if you click the little 'levels' button to the right


After that go to the snare mixerchannel and do as below, we are adding reverb and equing it abit.


Next, add a 3xosc. and do as below, we are selecting a saw wave. using one single oscilator


do the envelope as below along with the LFO (which is the main ingredience in producing dubstep, the LFO = woobble bass)


Write these two notes.


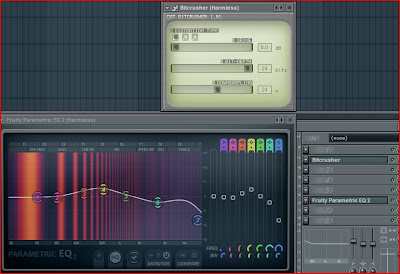
Assign the 3xosc to a mixer channel and do as below. The bitcrusher plugin can be downloaded free off the web. Also add a paramatic Eq.


You are actually done now, but because we doesnt want this dark 'no-melo' dubstep, we'll add a synth to make a melody.

Insert a WASP XT use the preset below and assign it to a mixer channel along with adding the shown effects, reverb and sound enhancer.


Open the pianoroll and write some notes that goes to the notes the bass had (F3), you can also just use mine.


For a better and simply mastering (we will come into this later) add a soundgoodizer to your masterchannel and tweek it as below.


You are done now, write it in your play list and play the dubstep beat!


Remember to check up for new posts on my blog and click the sponsored links if you like it.
If there is anything then comment below and I will answer as good as possible.

Here is the flp:
http://www29.zippyshare.com/v/31516180/file.html

Best regards
Søren


lørdag den 1. september 2012

The Beat - The Dance Beat

We are now looking on how to make the traditional 'dance beat'. By dance, I mean the genre Hands up (Hard Dance, if you will).

First Load up FL studio.
Take 'this' sample, put it into your step sequencer and write four notes:


Focus on the 'clap sample' and write 2 notes:


Next thing is to load up your favorite synthesizer. We are going for a bass now, Nexus has many presets (especially for Hands Up) Set your Synthesizer as below, also choose the trancebass 9 preset:


Then go the pianoroll of the Nexus instance and write a bassline. You can write the same as below if your out of creativity:


The next is the main lead. I am using the plugin ANA VSTi which can be customized a little more than Nexus. Below is the preset I am using for the main lead:


Write a melody which goes along with the bassline (same chords) You can use mine as before if you like, they will match for sure:


Take 'this' sample, tweet the volume as below and leave it:


Assign the different instances (both samples and Vstis) to a mixer channel:


Put 'this' Maximus preset on the kick (one I prefer you can leave it without if you like I just think it makes a better sound)

Next thing is to tweet the main lead sound a bit, we want to make it more phat which is done by using reverb and eq. Load the same instances (except Blood overdrive) and tweek them as below:


Now paint the patterns made in the step sequencer as below and set your BPM (Beats per Minute) to 143.


And you are done!

Here is the FLP
http://www8.zippyshare.com/v/23425729/file.html


Remember to check up for new posts on my blog and click the sponsored links if you like it.
If there is anything then comment below and I will answer as good as possible.

Best regards
Søren


The next tutorial will concern the dubstep beat!

tirsdag den 28. august 2012

The Beat

Now we know the basics of Fl studio, which does that we can move on to the actual beats!
In electronic dance music, there are many different genres. The genre I'll try to remake include Dance, House, Hardstyle, Dubstep, Trance and Psytrance. There will primarily be focuse on the Trance genre as this is the genre I work in, but I will try to cover the general characteristics of every genre.


I will hope to get some more response from these tutorials and glad to see the view count increase.


Regards
Søren

søndag den 26. august 2012

The Basics - The Sample

Here is a small post, with focus on the sample window as seen below:


Try opening the window and turn some of the knobs.
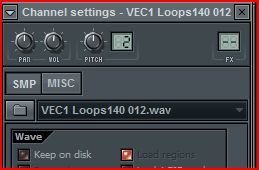
You will see we are using the Snare Basic.wav sample.
3 knobs are visible at the top of the window. The first Pan is whether the sound should be playing in the left or right speaker (or in the both as it does now). We see a Vol knob which controls the volume. We also have a pitch knob with has this scroll knob (the 2, which displays the pitch know range).
We see a timestretch panel with options for timestretching, pitch, the multiplicator, time and method.
Below a precomputed effects, with both knobs and '2 way-knobs' which pretty much explain them self.
In, out, a little pitch effect 'Pogo', a crossfade loop effect and the 'Silence trimming threshold'.

My best advice is simply to turn everything that can be turned, see what happens and then probably learn what they do. However, this was a small introduction to the sample window as it does not seem quite foreign.


Remember to check up for new posts on my blog and click the sponsored links if you like it.
If there is anything then comment below and I will answer as good as possible.

Best regards
Søren
The Basic. Explanation - The Different Windows

Fl studio has many different functions. These functions can be seen through the many windows, the program consists of. In the following section I will try to explain the elementals of these windows.

First we have the 'Browser/Plugin Picker'. Which isnt much of a plugin picker more a sample/preset/project picker. Here you can store your samples and project. It shows an detalied overview of different folders. See for your self below:


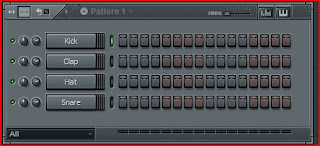
Here we have the 'Step Sequencer', which is where the actual magic happens. This is where the beats are created at a simple stage, when introduced to the pianoroll we will go deeper into both melody and beat creation. The Step Sequencer is usefull if you are dealing with samples and stuff.


The pianoroll which was mentioned above is a function where you can design what the actual 'computer-keyboard' is going to play (you can see the different notes). The picture below gives a better picture on it (try messing around with the different notes. You can also here paint the notes):


Next we have the playlist. This window is used for 'painting' the pieces you made in the step sequencer (and the piano roll) into one song. It consists of different tracks and can host the different patterns made in the sequencer.


Another thing is the mixer. This mixer is actually used for mixing your track. Controlling the different volumes for the different channels. We see a Master channel along with 1,2,3,4,5 etc. channels. It also consists of 1-4 send channels which will be explained later.


This little overview will prepare you even more for creating sweet sounds in FL.

Remember to check up for new posts on my blog and click the sponsored links if you like it.
If there is anything then comment below and I will answer as good as possible.

Best regards
Søren


The Basic - Automation in FL studio.

One of the primary basics in music production is the ability to make the 'machine' automate something.
Since you cannot keep track of more than one thing (whether it's live or at home in the studio), automation needed. It is therefore, necessary to leave the machine to do some of the work.

First load up FL studio.


Afterwards drop this 'midi-file' (as midi-notes are needed and I am too lazy to write them my self)


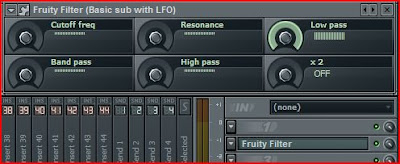
Insert your favorite Imageline synthesizer (if you dont prefer any or are a beginner just choose Sytrus.) Navigate through the dropdown menu in the uber left corner to presets and choose 'Basic sub with lfo.


You will now hear the melody playing (If you press play of course). A channel settings window has also oppened. Navigate through the drop down menu uber left to 'assign free mixer track' which will make your synth appear in the mixer:


Now in the right side of the mixer, load a 'Fruity Filter' by clicking on the 'down' arrows (this is the effect section:


Right-click on Cutoff Freq and choose 'Create Automation Clip'. A red piece will now appear in the playlist window (as seen below). Press the 'Playlist - (none)' above the numbers 1,2,3,4,5,6 etc. and choose pattern 1 as your source. Now 'paint' the pattern1 on as seen below:


Shape the automation clip as below and press play. You should now hear of the melody is fading in getting lowpass-filtered. You have done it, you have made the maschine automate the Cutoff!


This metode can be used on the native plugins of FL. If you want to automate third party plugins, the approach is a little different. First load up your 3rd party synth. I choose ReFX Nexus. Through the dropdown menu press 'Browse parameters'. Remember to turn the knob cutoff before browsing the parameters (telling the maschine this is the parameter you are looking for).


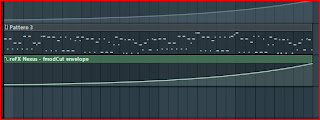
This should lead you to something like this. Right click on Fmodcut (which in this case is the cutoff and select 'Create Automation Clip'.


 The same thing as before - draw it, and there you go:


Not only the cutoff can be automated, alot of things can. Things like the tempo, main volume, volume of the different mixer channels, volume of the effects. There are endless possibilites of things to automate!
The project file is 'here' but follow the tutorial if you haven't, you will learn alot more.

Remember to check up for new posts on my blog and click the sponsored links if you like it.
If theres anything then comment below and I will answer as good as possible.

Best regards
Søren


EDM-Tutorials


Hello and welcome to this blog.

My name is Søren. I am 19 years old, from Denmark and have been producing electronic music for about 5 years now. I feel it is the time to share my knownledge about music-production with the rest of the world.

I will in the coming months (years) try to upload tutorials and tips on how to make electronic music. There will be new posts between 2 and 3 times a week.

The order of 'these' posts would be roughly chronological so the basic knowledge comes first. I will then try to advance and bring in the more difficult stuff afterwards.

It will mainly be in the program 'FL Studio', however, I may try out in Ableton Live as well.
The posts will primary concern EDM (electronic dance music).
Everything from Sound Design to the technical aspect will be explained.

I hope you will enjoy the blog and spread the word if you feel it gives you something.


Best regards
Søren